Premiere Pro proposes a way to merge audio and video clips together under the name "Merge Clips". This function, among others things, helps users to synchronize audio and video.
Merged Clips are not well supported in Premiere Pro and have Limitations and
known issues.
Because you need to perform some audio post-production,
change "Interpret Footage" values of a Merged Clip or bypass a Merged Clip
Limitation, we explain here how to properly unmerge your Merged Clips in
Premiere Pro using a native solution or PlumePack.
This will convert your Merged Clip into a normal Premiere Pro sequence with normal clips inside.
Without PlumePack
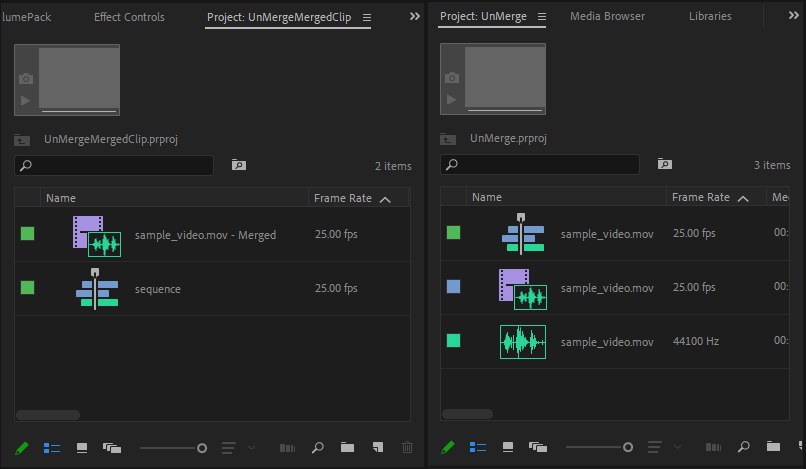
There is a native solution that you can use to unmerge your Merged Clips: use Final Cut Pro XML export.
How to do it
First step is to export your project in a Final Cut Pro XML file, you need to
follow: File -> Export -> Final Cut Pro XML. Now you can create a new
empty project and then import the Final Cut Pro XML export file using: File
-> Import.
Here is a preview of a before/after for a single Merged
Clip project:
Problems with this solution
However this solution is far from perfect, let me explain why.
First you have no options to choose what you want to export, it will export the whole Premiere Pro project into an XML file. This means you cannot select only some Merged Clips you need to work on, all your Merged Clips will be converted to normal sequences.
Moreover the Final Cut Pro XML export does not support well all Premiere Pro features: some effects and keyframes could be not well preserved when re-importing the XML file.
This is the reason why we choose to propose a special Feature in PlumePack to UnMerge Merged Clips.
With PlumePack
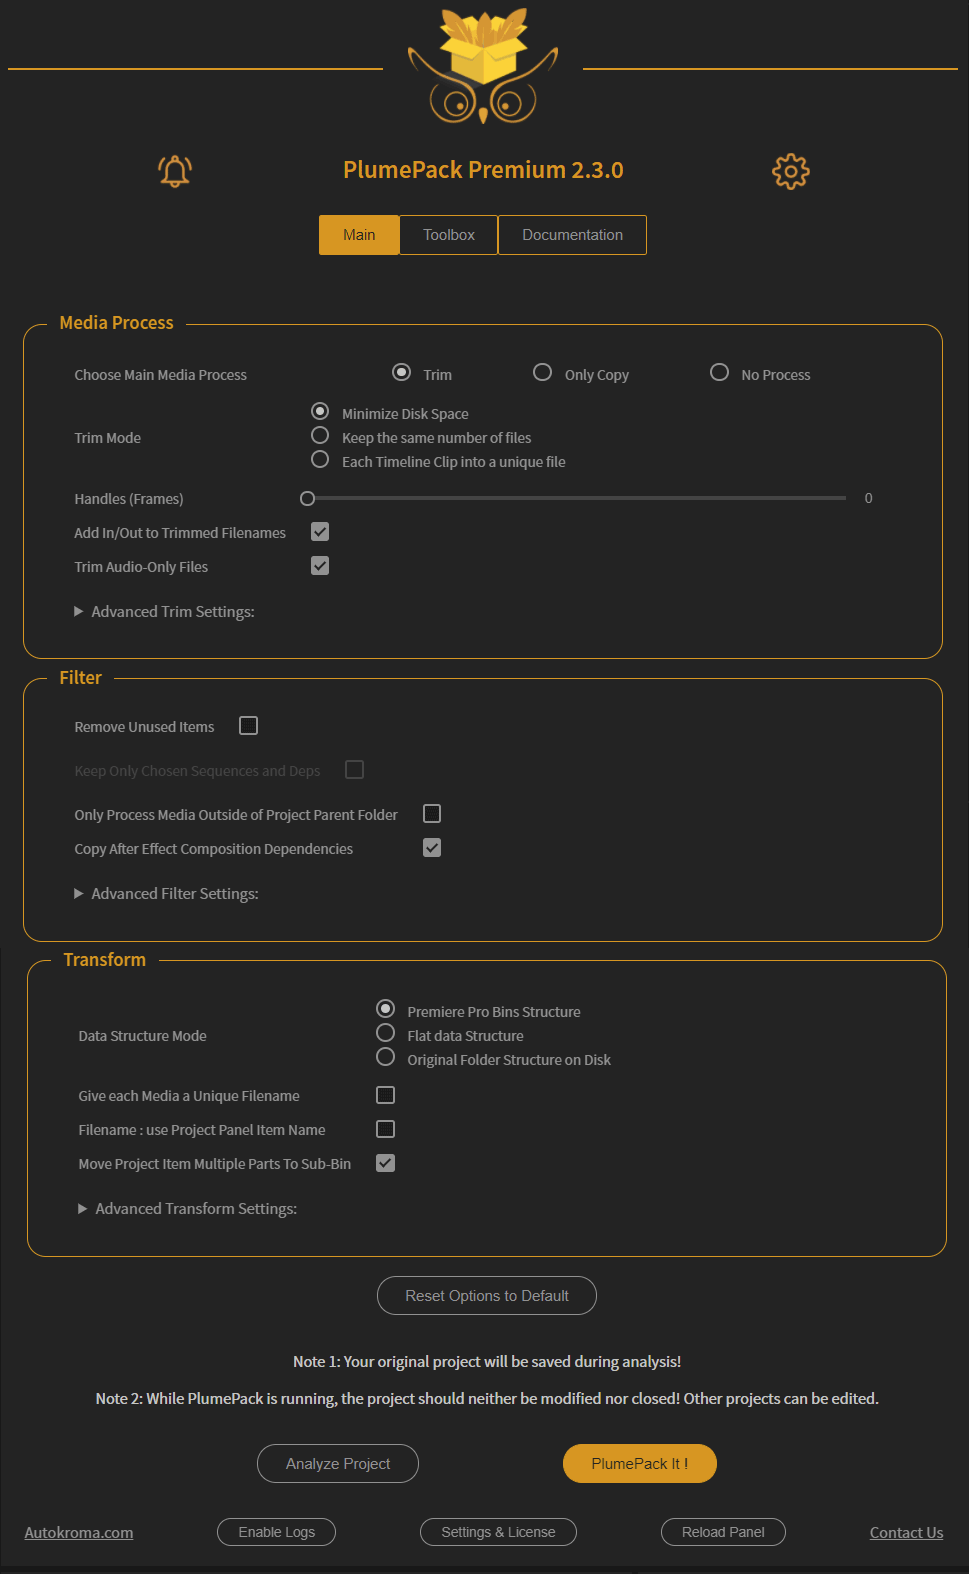
PlumePack is a Free Plugin from Autokroma with a Premium version.
With the Premium version you can access to a Toolbox with independent scripts to perform specific actions. Among them one can be used to unmerge Merged Clips.
First Step : Install and License PlumePack
The first step is easy, close Premiere Pro, download and install PlumePack from our installer and follow the different steps.
The PlumePack Panel can then be found in the Premiere Pro top menu, under "Window" -> "Extensions" -> "PlumePack Panel".
To remove the restrictions of the Free version and use the UnMerge feature you will have to purchase a license and register it. In order to do it, please follow this article.
Second Step : Launch UnMerge Feature
Go to PlumePack "ToolBox" tab, then in "On Project Items" section choose if you want to UnMerge all Project Items or only a selection by choosing between: "On Every Project Items" or "On Selected Project Items".
If you chose to UnMerge only a selection of Project Items you now need to select in the "Project" tab of Premiere Pro which Merged Clips you want to UnMerge:
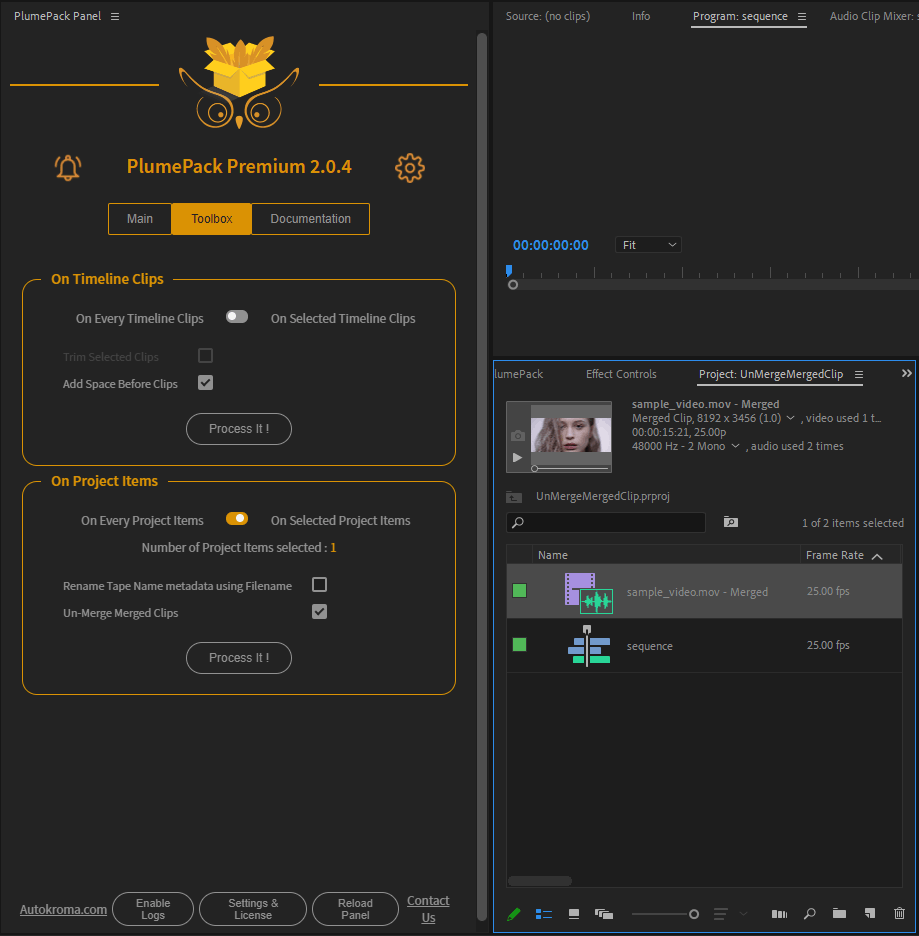
Then make sure "UnMerge Merged Clips" is checked and click on "Process It !".
You will then have to choose where the new project will be saved.
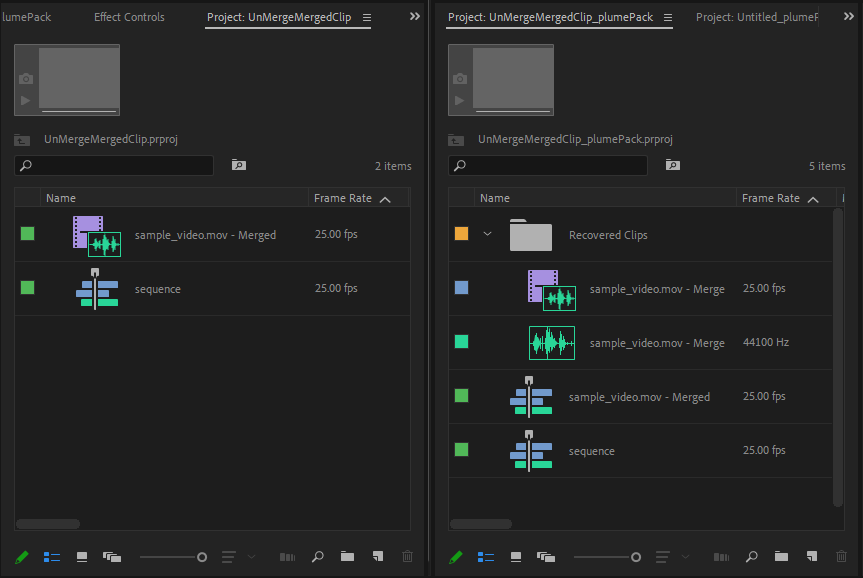
You can see on this screenshot on the left the original Merged Clip and on the right the result of the process where the Merged Clip has been converted to a sequence with normal clips inside.
More features with PlumePack
PlumePack has a lot of other features like organizing your new trimmed project media structure, copying dependencies of your After Effects composition, and PlumePack can trim a lot of other codecs such as R3D RAW, ProRes, ProRes RAW, DNG, Image Sequence, DNxHD, HAP etc.
Check out this article to learn more about PlumePack great features !