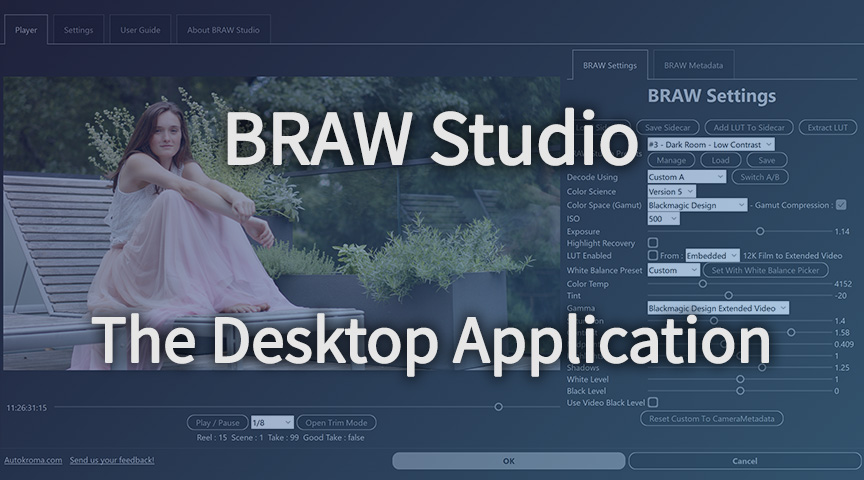
With the release of BRAW Studio Version 3.0, we're excited to introduce a new tool for BRAW files: the BRAW Studio App!
This advanced BRAW player app comes packed with many features for working with BRAW files. If you're not familiar with BRAW Studio yet, make sure to check out our introduction article!
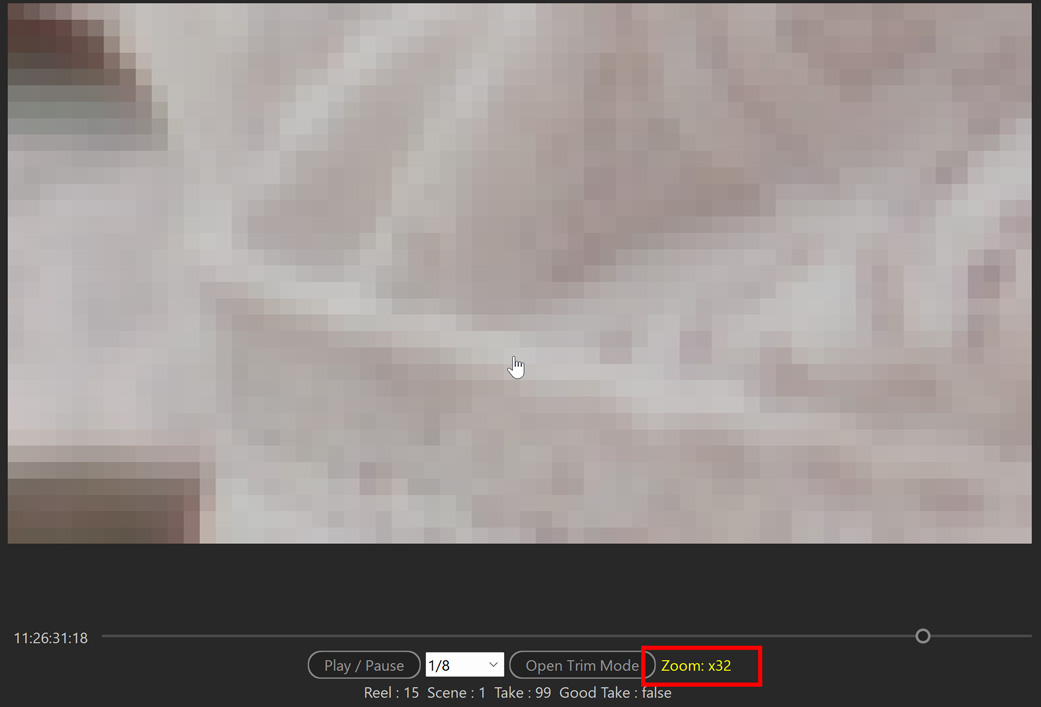
A BRAW Player with Zoom !
The BRAW Studio App is first and foremost a classic player! Simply double-click on the grey image or drag and drop a BRAW file to import it. Then, use the "Play/Pause" button to start playback (or hit the space bar on your keyboard). With your keyboard arrows, you can also jump from frame to frame! The sound should automatically play along with the video (using the default audio device set in your computer).
Playback performance is significantly improved when the displayed image has the same resolution as the one we can get directly with the BRAW SDK. So, we generally recommend using 1/8, 1/4, 1/2, or full resolutions. You can also zoom in on the image to see pixels using the mouse wheel!
The Trim Tool
After clicking on the "Open Trim Mode" button under the player, a new double slider will appear. With it, you can set in/out points of your BRAW file and then export a trimmed BRAW file with the same quality, metadata, and only the frames you set with the slider.

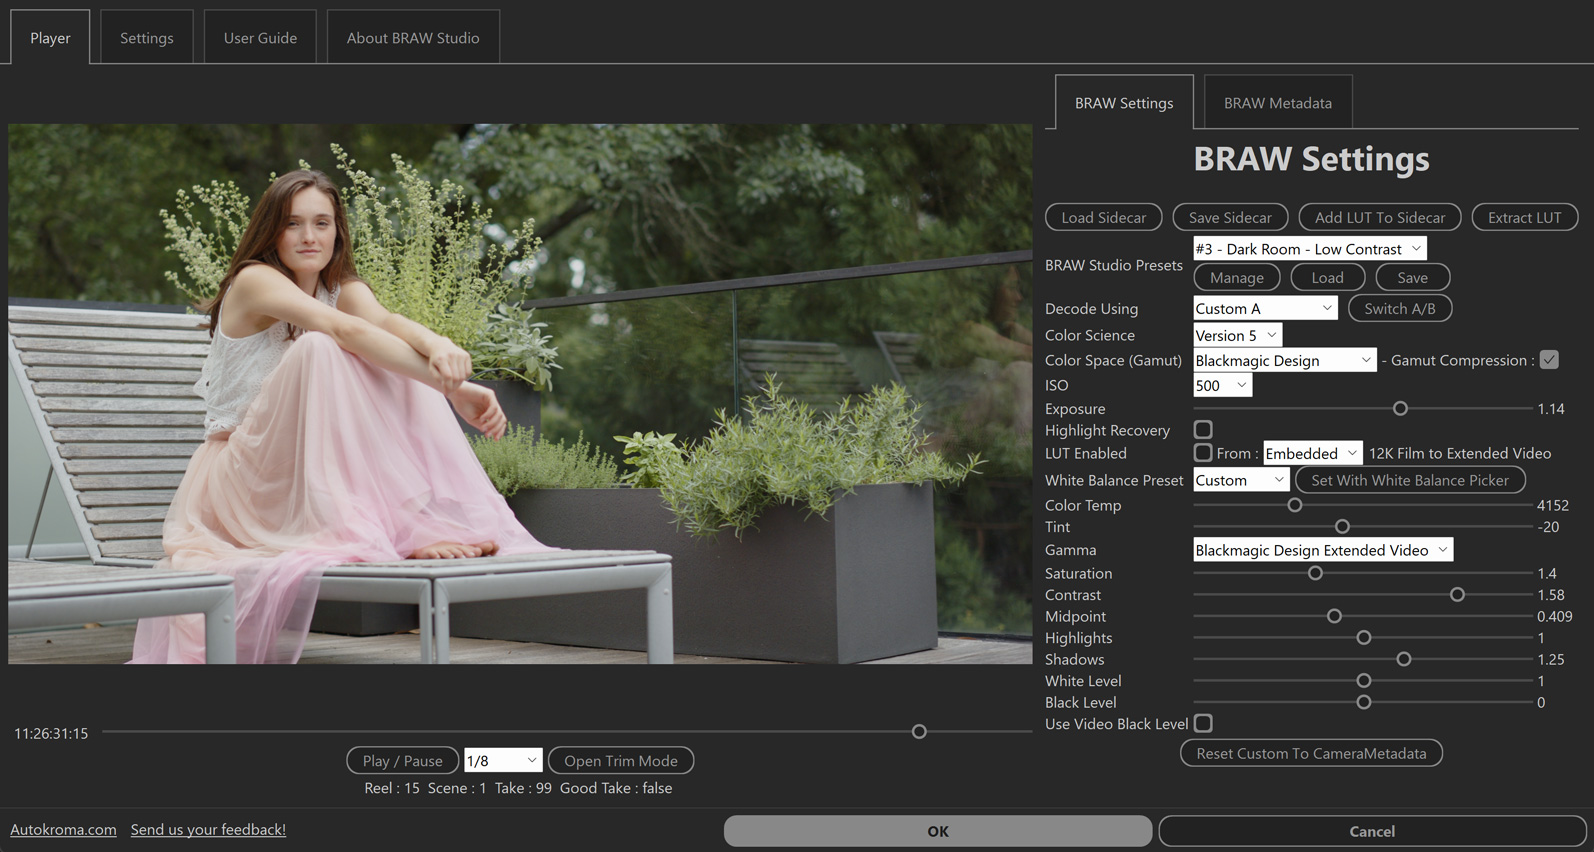
Edit the BRAW Settings
On the right side of the app, you'll find all the BRAW Settings you can set. Here are some details:
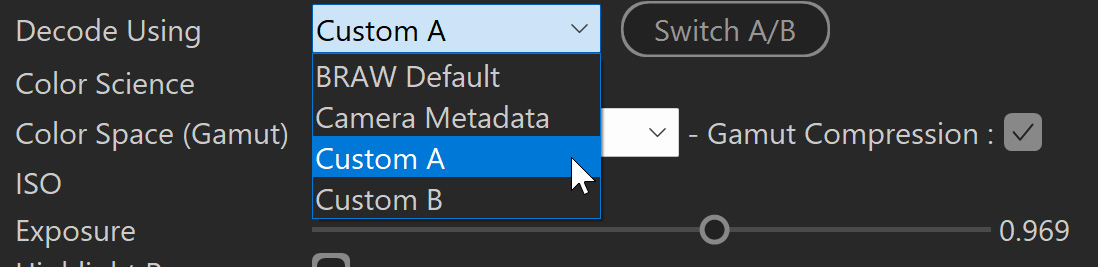
Decode Using Dropdown :
Just like inside Premiere Pro or After Effects, the "Decode Using" dropdown has the following values:
- BRAW Default: constant defined values
- Camera Metadata: uses the first Sidecar file Settings (if present next to the BRAW file), or the internal BRAW Settings (generally the ones set while shooting)
- Custom A / Custom B: where you can change the BRAW Settings. There are 2 customs (A and B) if you want to compare 2 different sets of settings.
Save your edit through Sidecar
The settings of Custom A/Custom B can be saved into a .sidecar file next to the BRAW file. This sidecar file is part of the official BRAW format, and the settings will be automatically loaded when imported into any software that supports BRAW files!
If the sidecar content changed while you are editing your BRAW file with the BRAW Studio App, the "Load Sidecar" button can be useful to set those settings; otherwise, it should have the same effect as the "Reset Custom to Camera Metadata" button.
Add Custom LUT or Extract Embedded
The BRAW SDK can also use LUTs in the decoding process. It means that the LUT is directly used by the BRAW SDK and so is applied in a high-quality pipeline context.
Generally, the LUT can already be present in the BRAW file if the user set a LUT in the camera. So you can use it or not in the BRAW settings. With the "Extract LUT" button, you can export this internal LUT to a .cube file to apply it to other files (BRAW or not!).
If you want the BRAW SDK to use a custom LUT you have (so it is used by the high-quality decoding pipeline), the "Add LUT to Sidecar" button is here for that! Once this button is used, if you tick the "LUT Enabled" checkbox and use "Source": "Sidecar" (done by default once this button is used), the LUT will be used!
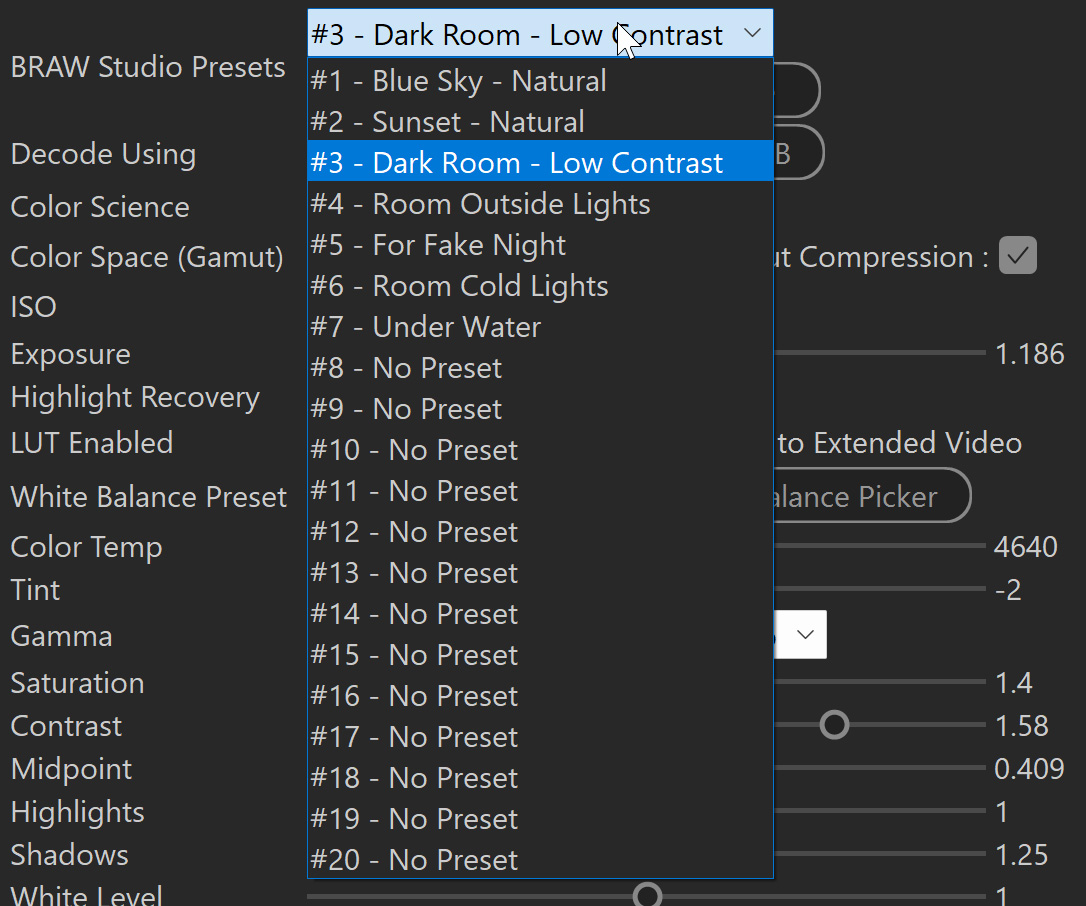
BRAW Studio Presets
You also have access to the same presets used in Premiere Pro or After Effects! The location of those presets is shared across Adobe apps and the BRAW Studio App. Check out this article detailing the use of the BRAW Studio presets
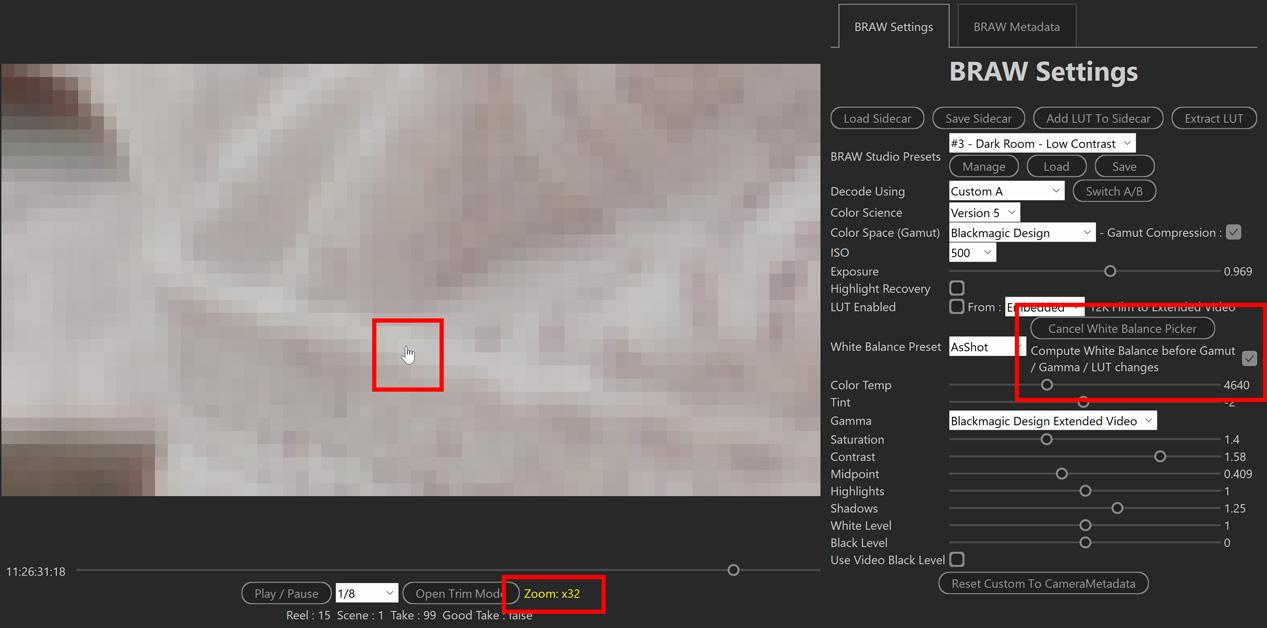
The White Balance Picker integrated tool
The White Balance tool is directly integrated (it does not open a new window like in Premiere Pro/After Effects).
Once the button is clicked, just click on the image: the White Balance values will be computed and set from the position of your click.
You can zoom on the image before clicking if you want to be more precise!
Also, once the button is clicked, there is a special param you can enable: "Compute White Balance before Gamut/Gamma/LUT changes." More information about it can be found in our White Balance Picker article.
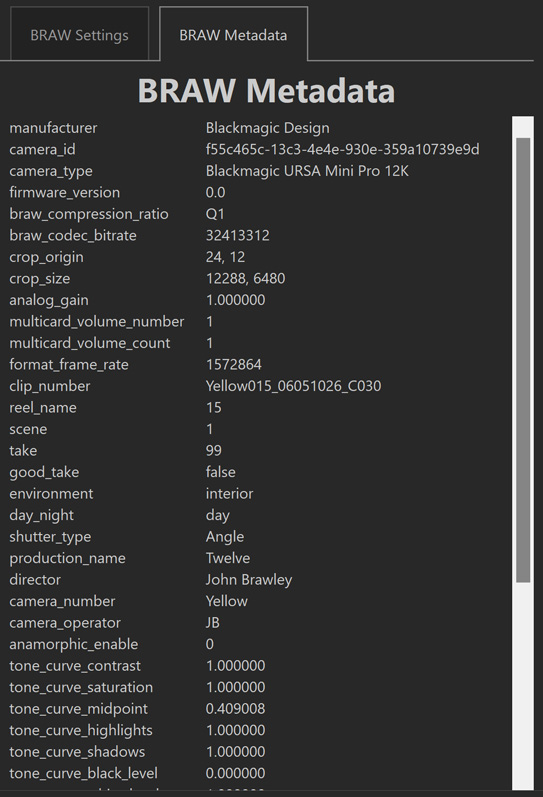
Check all BRAW Metadata
At the top of the Settings, you will notice a "Metadata" tab. Click on it to be able to see all BRAW Metadata from the current imported BRAW file !
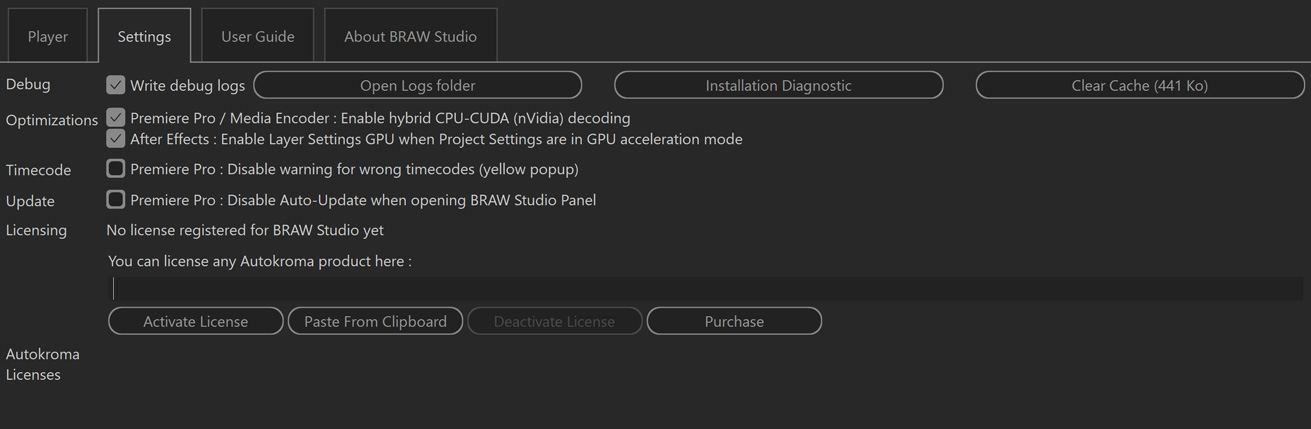
Access General BRAW Studio Settings and Register your License(s) !
At the top of the Application, click on the "Settings And License" tab to access general BRAW Studio Settings (to enable logs for example !) or if you want to register your license.
Advanced Tips
Shortcuts
- Spacebar : Launch Play or Pause in Player
- Arrows : Use the arrows to go one frame forward/backward
- Use Ctrl+Z for Undo while editing BRAW Settings or Ctrl+Shift+Z for Redo (Note : it is Ctrl even for Mac users !)
- Use Shift while dragging a Slider to drag it slowly and get a better precision !
Others
- You can Drag and Drop a BRAW file into the window to import it
Conclusion
The BRAW Studio App is a powerful tool that can be used to play and edit BRAW files. It offers many features that can help improve your workflow, such as the ability to trim your footage, edit BRAW settings, and apply custom LUTs. If you work with BRAW files, the BRAW Studio App is definitely worth checking out!
We hope you enjoyed this article and found it informative. If you have any questions or comments, please contact us.