Update: H264/H265 are not in the "Beta" Codec List anymore ! We have fixed a lot of issues for those files, so those files can be trimmed safely now.
What does Trimming mean ?
Trimming is like copying a part of your footage. It will remove the images before an InPoint and after an OutPoint set for the footage, while keeping all the file metadata and Source Settings.
Trim you AVC / H264 and H265 file with the PlumePack Panel
Trim is FREE for projects under 60GB since PlumePack V3. For larger projects a PRO or UNLIMITED license is required.
Import your files and choose your bounds
First, import all the files you want to trim in a timeline.
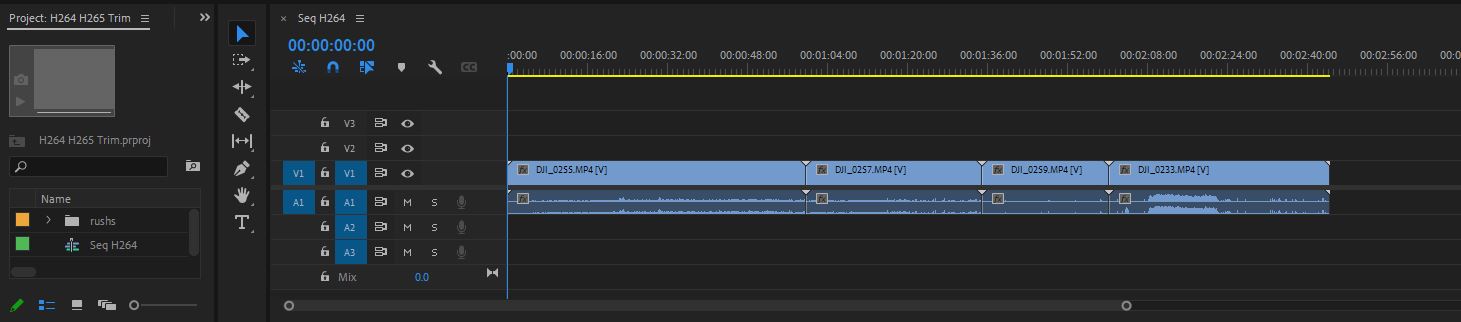
Then choose the bounds (inPoint and outPoint) for each file.
Now you are ready to trim your files!
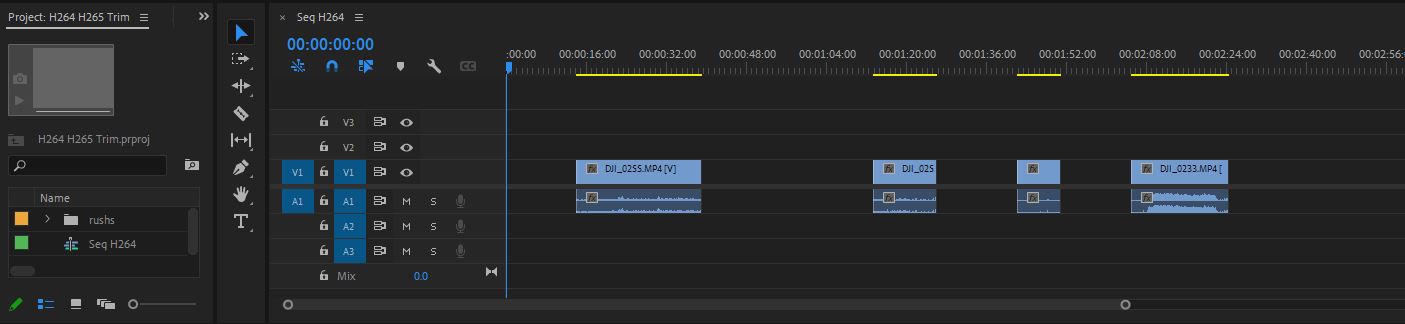
As you may have noticed, editing your timeline as usual has the same effect : your clips in timeline will be cropped and ready to be trimmed for backup or project transfer !
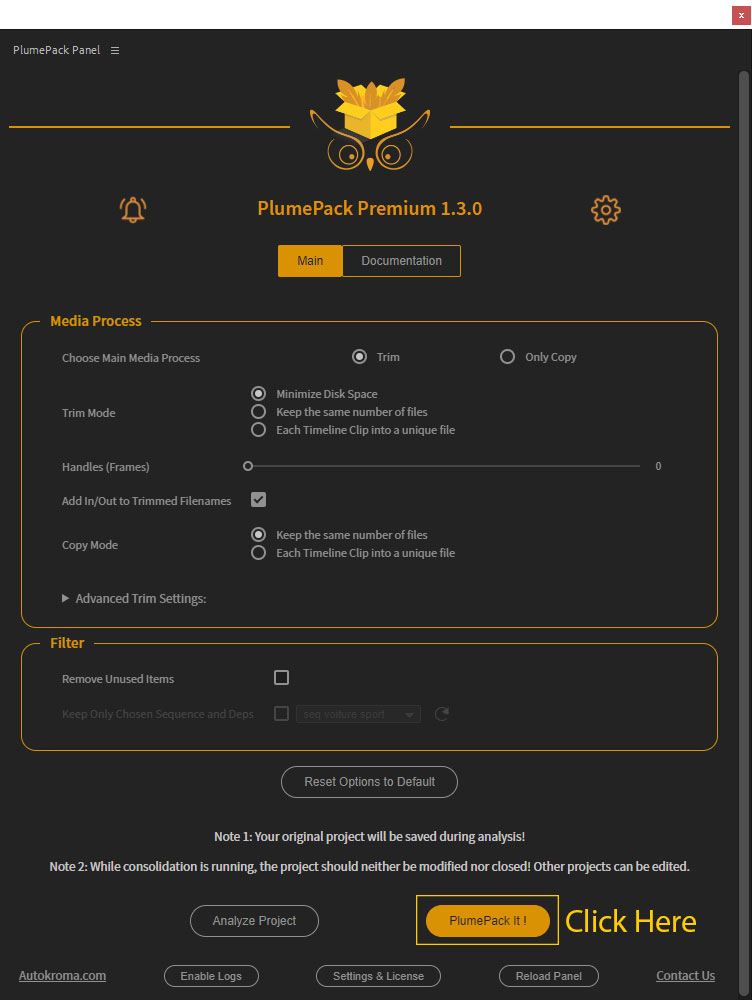
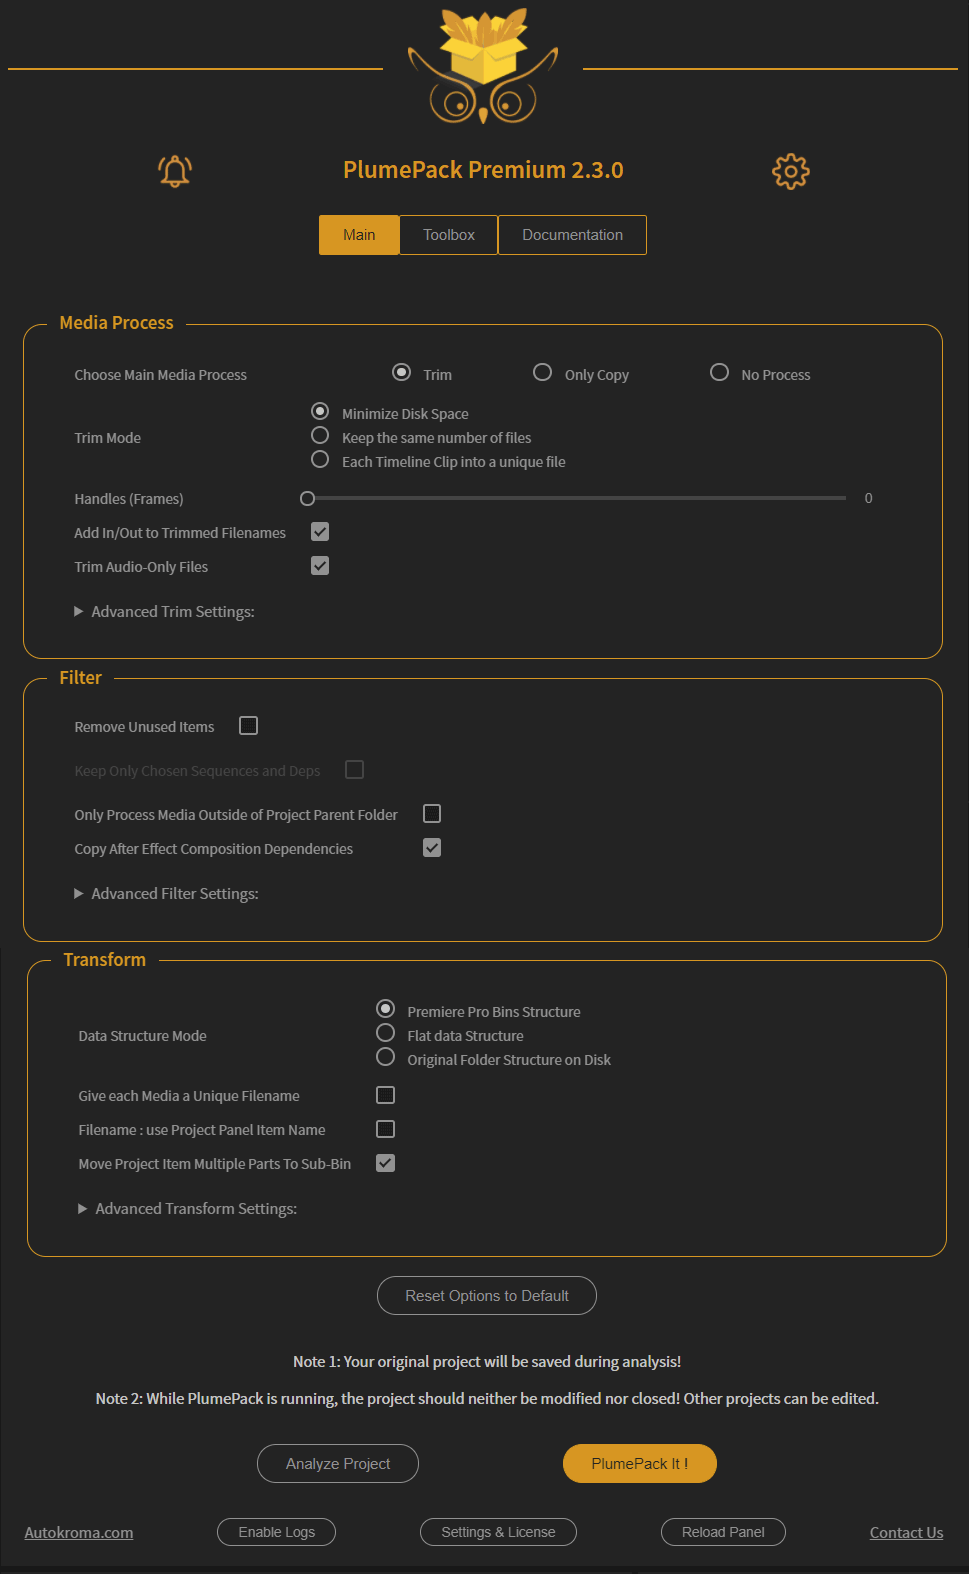
Open PlumePack Panel: Window -> Extensions -> PlumePack Panel.
To learn a bit more on all PlumePack options you can read this article
Then just click on "PlumePack It!" and choose a folder to save your trimmed media. It also saves a copy of your project with files replaced by the trimmed files.
At the end of the trimming process, the output chosen folder is opened with all your files inside the "Media" directory.
With highly compressed videos such as H264 and H265 the trimmed files will very often contain more frames than necessary (unused for editing) due to the nature of the compression. That is a normal behavior, and most of the unused frames will still be trimmed, so most of the work to reduce your media file size will be achieved with PlumePack even if the bounds are not exactly the right ones, do not worry, the difference might only be of 1 or 2%.
To understand better this behavior (happening only for H264/H265 files) a little explanation on compression is needed (See last section: "H264 and H265 compression").
If you don't know yet about the PlumePack Panel, please check this article to get all details needed about it.
PlumePack: a powerful tool in your workflow !
PlumePack does more than just trimming your files, it works like a Project Manager.
It can be used in different kind of situations :
Start editing with a lighter project
After importing your files inside Premiere Pro, and before starting to edit your project, add your files to a timeline and then crop your files to select only the parts you want to use.
Then run PlumePack and your Project Items will be automatically replaced with the trimmed files.
That's really handy especially if you are working on SSD where space can be short.
Transfer lighter projects between team members
PlumePack can save you a LOT of space used by your project, without altering quality (which will stay exactly the same) and by keeping your codecs. You can also only trim a part of your project easily. So it is perfectly suited for speed up your project transfer.
Save Lighter Backups
When it's time to backup your project, use PlumePack to be sure to collect everything needed in your project, and get the lighter project as possible while keeping footage codecs and quality.
More features with PlumePack
PlumePack has a lot of other features like organizing your new trimmed project media structure, copying dependencies of your After Effects composition, and PlumePack can trim a lot of other codecs such as R3D RAW, ProRes, ProRes RAW, DNG, Image Sequence, DNxHD, HAP, ...
Check out this article to learn more about PlumePack great features !
H264 and H265 compression
One thing to know about files encoded with these codecs is that they are compressed. There is two kind of compression which can be used: intra-frames compression and Long GOP compression.
For file using only intra-frames compression it is possible to lossless trim with any giving bounds (inPoint and outPoint) but for Long GOP compression it is a bit more complex. Let me explain the difference between both to help you understand why.
Intra-frames compression
For intra-frames compression each frame of a video is encoded independently. This means that we do not need previous or next frames to decode a given frame.
The compression is done for each frame using a spatial compression algorithm, like the compression used in JPG files for instance.
So in this case of compression our Trim Engine can trim the file at any bounds without issues.

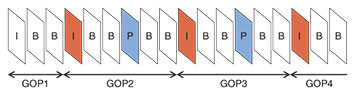
GOP compression
For GOP (Group of pictures) compression, a video is encoded using group of pictures with:
- Intra frames (also called I frames), pictures that are compressed independently of all other pictures
- Inter frames, pictures that are compressed based on previous and/or next decoded frame => You need to decode the dependent frames before decoding this one.
Because of this, editing with this kind of codec is not the best option if you need performances. For example, if you randomly want to render an "inter frame" image, Premiere Pro will first need to render the dependent frames before rendering the wanted frame.
To trim such a file without re-encoding a part of it, the bounds must be on intra-frames to preserve the Groups of Pictures.
That's why PlumePack, from the In Point / Out Point used in your timeline (and the handle option), will trim your files from the first "Intra-Frame" before an InPoint given, and the next "Intra-Frame" after an Outpoint given.
Now you know everything about Trimming H264 and H265 in Premiere Pro, you should be able to get lighter files and projects in Premiere Pro !
Contact us to tell us your needs! We might find more solutions to your issues