What does AfterCodecs do?
AfterCodecs is a new native plugin for the whole Adobe CC Video suite, working on both macOS and Windows. It brings fast and efficient codecs to After Effects’ render queue and a new format choice in Premiere Pro and Media Encoder's Export Window.
AfterCodecs offers more advanced audio features in Premiere Pro, but first this article will take you through exporting/importing different types of audio. There are myriad of audio features, tools and settings in Premiere Pro, especially since the addition of the essential sounds panel in 2017. We will go through some of those options for Mono, Stereo, and 5.1, including mono split tracks and audio channel mapping for 5.1 files.
Exporting/Importing Mono
The main way mono is used in most workflows is to create a L/R stereo split track, but Premiere does allow you to export a single mono track as well. In terms of importing, very little can go wrong with mono as it is just a single channel of audio.
Exporting a Mono Track
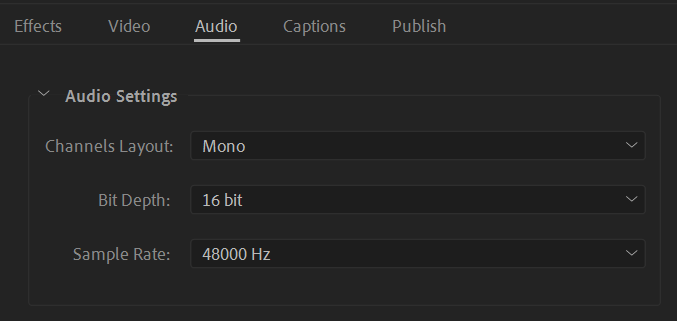
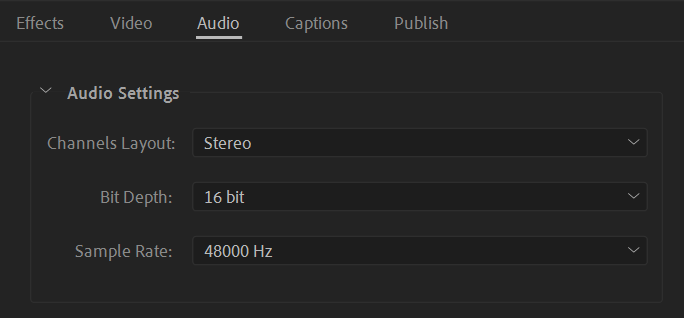
Exporting a single mono track is very straightforward. All you have to do is select Mono under the Audio tab of your Export settings, as seen below. This will mix down your sequence audio into a single mono track. If you would like to have more control over this mix, you can create a mono sequence and export it.
Exporting Mono Split Tracks
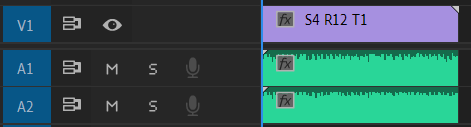
To export a L/R split track, first it is necessary to make sure your stereo files are being interpreted correctly using Premiere Pro’s audio channel mapping feature. The audio channel mapping section of our Premiere Pro audio basics article covers how to separate a stereo file into two mono tracks. Once you have remapped your stereo file, it should be separated into two mono tracks, as seen below. If your stereo file is already split into two mono files, you can simply drag them into a sequence.
Create a stereo sequence and add 2 mono tracks to it. This can be done when creating the sequence or after the sequence is already created. To add mono tracks to an already existing sequence, right–click and select Add Tracks.
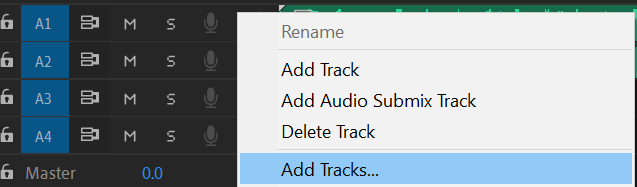
Select 2 as the number of tracks you would like to add and select where you would like them placed. Select Mono in the Track Type drop-down menu.

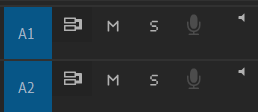
The two mono tracks will be identified by a small speaker symbol next to the track, as seen below. Drag your stereo file into the sequence and place it on both tracks. It should be laid out on 2 tracks automatically if you interpreted it properly.
Once your stereo file is on both tracks, in this case A1 and A2, open up the Audio Track Mixer – not to be confused with the Audio Clip Mixer. To open it, go to the Window tab on your top main menu and you will find it.
Assuming that A1 is your left track, turn the audio panner all the way to the left or -100 and turn the A2 (your right track) panner to 100.
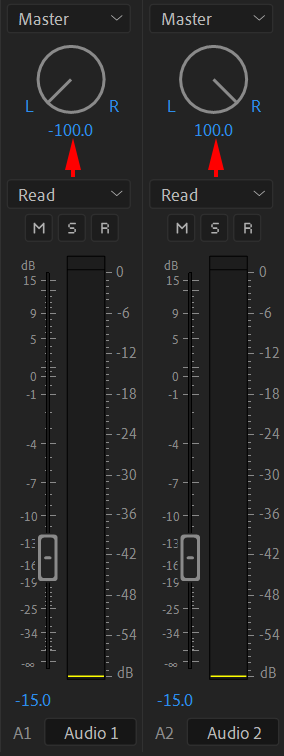
Now A1 will only output to the left, and A2 to the right. You can test this by muting one of the tracks. The other track should only play on its designated speaker. Now you can open your Export menu and select Stereo as your Channels Layout to export your mono split tracks.
Importing Mono
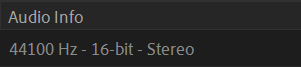
Importing mono is very straightforward, as there is only a single channel of audio, meaning it will rarely be interpreted incorrectly. You can always check the Audio Info column in your Project tab to make sure the file is being interpreted correctly.

Exporting/Importing Stereo
Exporting Stereo
Because stereo is used as the default for most audio processes in Premiere Pro, that makes it the easiest to export/import. Most sequences you create will have a stereo master track by default. This means all the tracks in your sequence will be mixed down into a single stereo track. You can control the L/R mix of individual files using the audio panner in the Audio Clip Mixer window. Those changes will be reflected in the final export, when you select Stereo on the Audio tab of the Export Settings window.
Importing Stereo
Importing stereo is also a very simple process, your file will be interpreted as an L/R stereo if it has 2 channels of audio in it.
If you would like to have independent control over each channel of your stereo file, check the audio channel mapping section of our Premiere Pro audio basics article .
Exporting/Importing 5.1 Surround
This section will cover exporting/importing simultaneously, since how you import/interpret your 5.1 file will affect the process quite significantly.
Any sequence will technically support a 5.1 track, but, to have control over the mix, you need to create a 5.1 sequence. In the New Sequence window, under the Tracks tab, select 5.1 in the Master drop-down menu. If you have a 5.1 file that is already mixed and that you would like to export, you can create a 5.1 sequence with a single 5.1 track in it, as seen below.
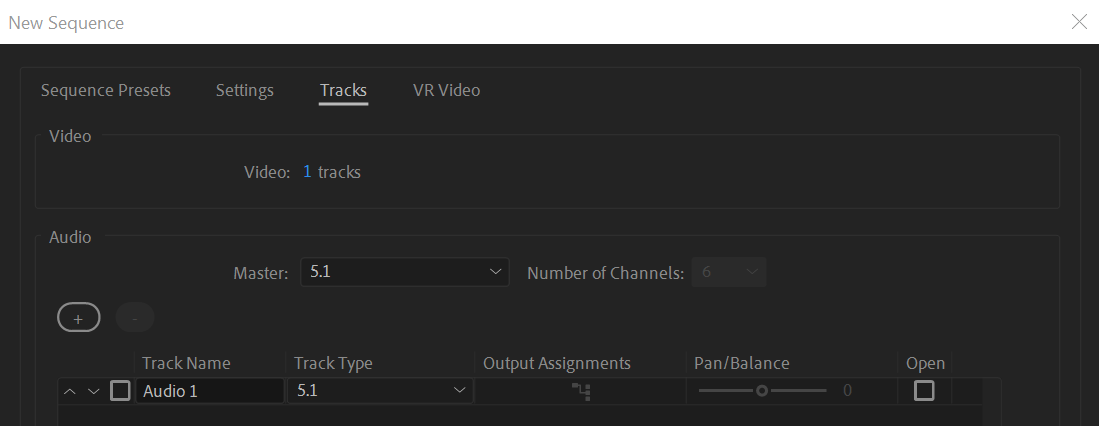
Then you can simply drop your 5.1 file into that sequence and export it. The export settings will be shown later.
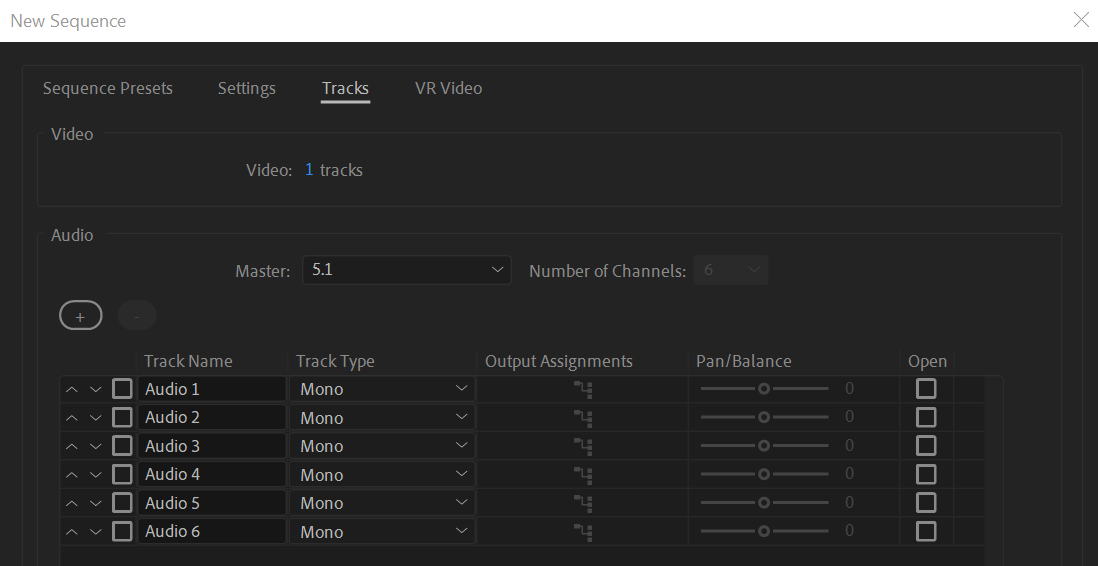
If you would like to be able to control all 6 tracks in your 5.1 file, the sequence needs to be created differently, and your file needs to be re-interpreted.
First, create your 5.1 sequence and add 6 mono tracks to it.
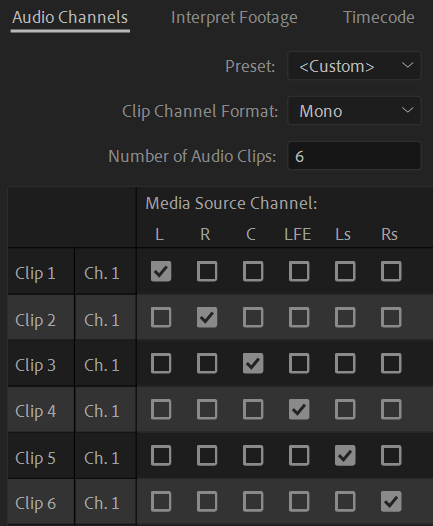
Then you need to interpret you 5.1 file as 6 mono channels. Right-click the file and select Modify > Audio Channels.
Change the clip channel format to Mono and the number of audio clips to 6. Doing this should automatically reassign all the channels correctly. It should look like the example below.
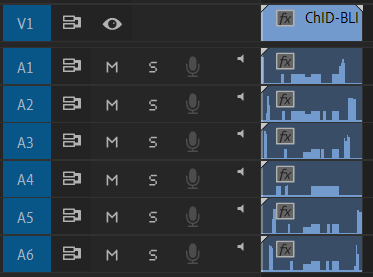
Once you have setup the 6 mono tracks in a 5.1 sequence, and that your file has been interpreted as 6 mono tracks, you can drop the file in that sequence.
The file in that sequence should now look similar to the image below. However, when playing back the file, you will notice that each track is not isolated in its designated channel. This is because the audio was broken down into mono tracks.
To fix this, go to the Window tab on the main top menu and open up your Audio Track Mixer. You should see a 5.1 panner for each track. Use the dot found in the middle of them and pan it so each track matches the correct speaker. You can use the screenshot below as an example, where the 5.1 SMPTE layout was used (L, R, C, LFE, Ls, Rs). Now, when you play back the file, each channel should be isolated in their correct speaker.
Note: This method will not isolate the LFE track. This requires a workaround with a multichannel sequence. Watch this tutorial from 13:02 (or watch the full video to find out how to mix 5.1 in Premiere).

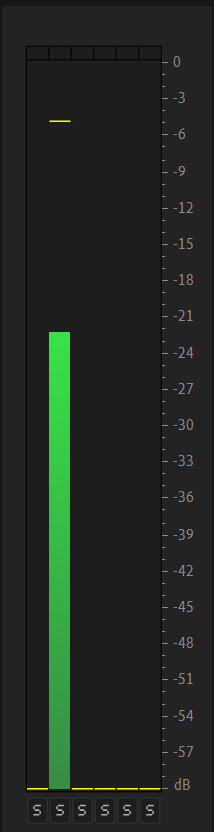
You can check the track isolation with the Audio Meter. If you solo one of the tracks, you should only get audio in one of the channels, as seen below. Once your tracks are isolated properly, you can edit/mix them as you wish before exporting.
Exporting 5.1
Many formats support 5.1 in Premiere Pro, most of them using the standard SMPTE layout (L, R, C, LFE, Ls, Rs). ProRes will be used as an example, but, as a general rule, you simply want to pick 5.1 from the Output Channels drop-down menu, under the Audio tab.
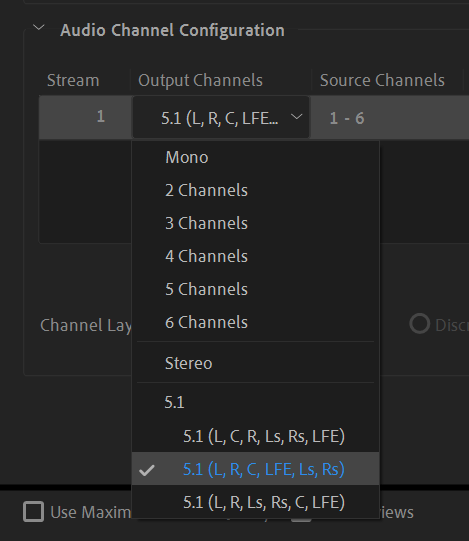
As you can see, ProRes gives you 3 different layout options for 5.1, but, in most cases, you want to use the SMPTE layout, which is the middle one, as seen above. Then hit export, and your file will have 5.1 audio!