
From PlumePack 3.0, you can now Transcode your clips to the codec you want. Let's check here in this aticle what it means, and how to use it.
Check this article to get more info about the other new PlumePack V3 features.
Transcode your clips with PlumePack
Why do editors want to transcode their clips in Premiere?
There are different reasons why you may need to transcode your clips in your Adobe Premiere project:
- You want to change your file codec because it is too heavy for your needs and slows down your timeline
- You want to save storage space, but your codec or clips cannot be trimmed with PlumePack, or trimming does not save enough space and you're willing to re-encode, accepting a slight quality change
- You want to deliver your clips in a specific codec to your colorist or VFX artist
Transcoding is useful for many types of projects and workflows, such as large film or documentary projects, remote collaboration, archiving, and delivery preparation.
PlumePack saves you a lot of time in your transcoding process
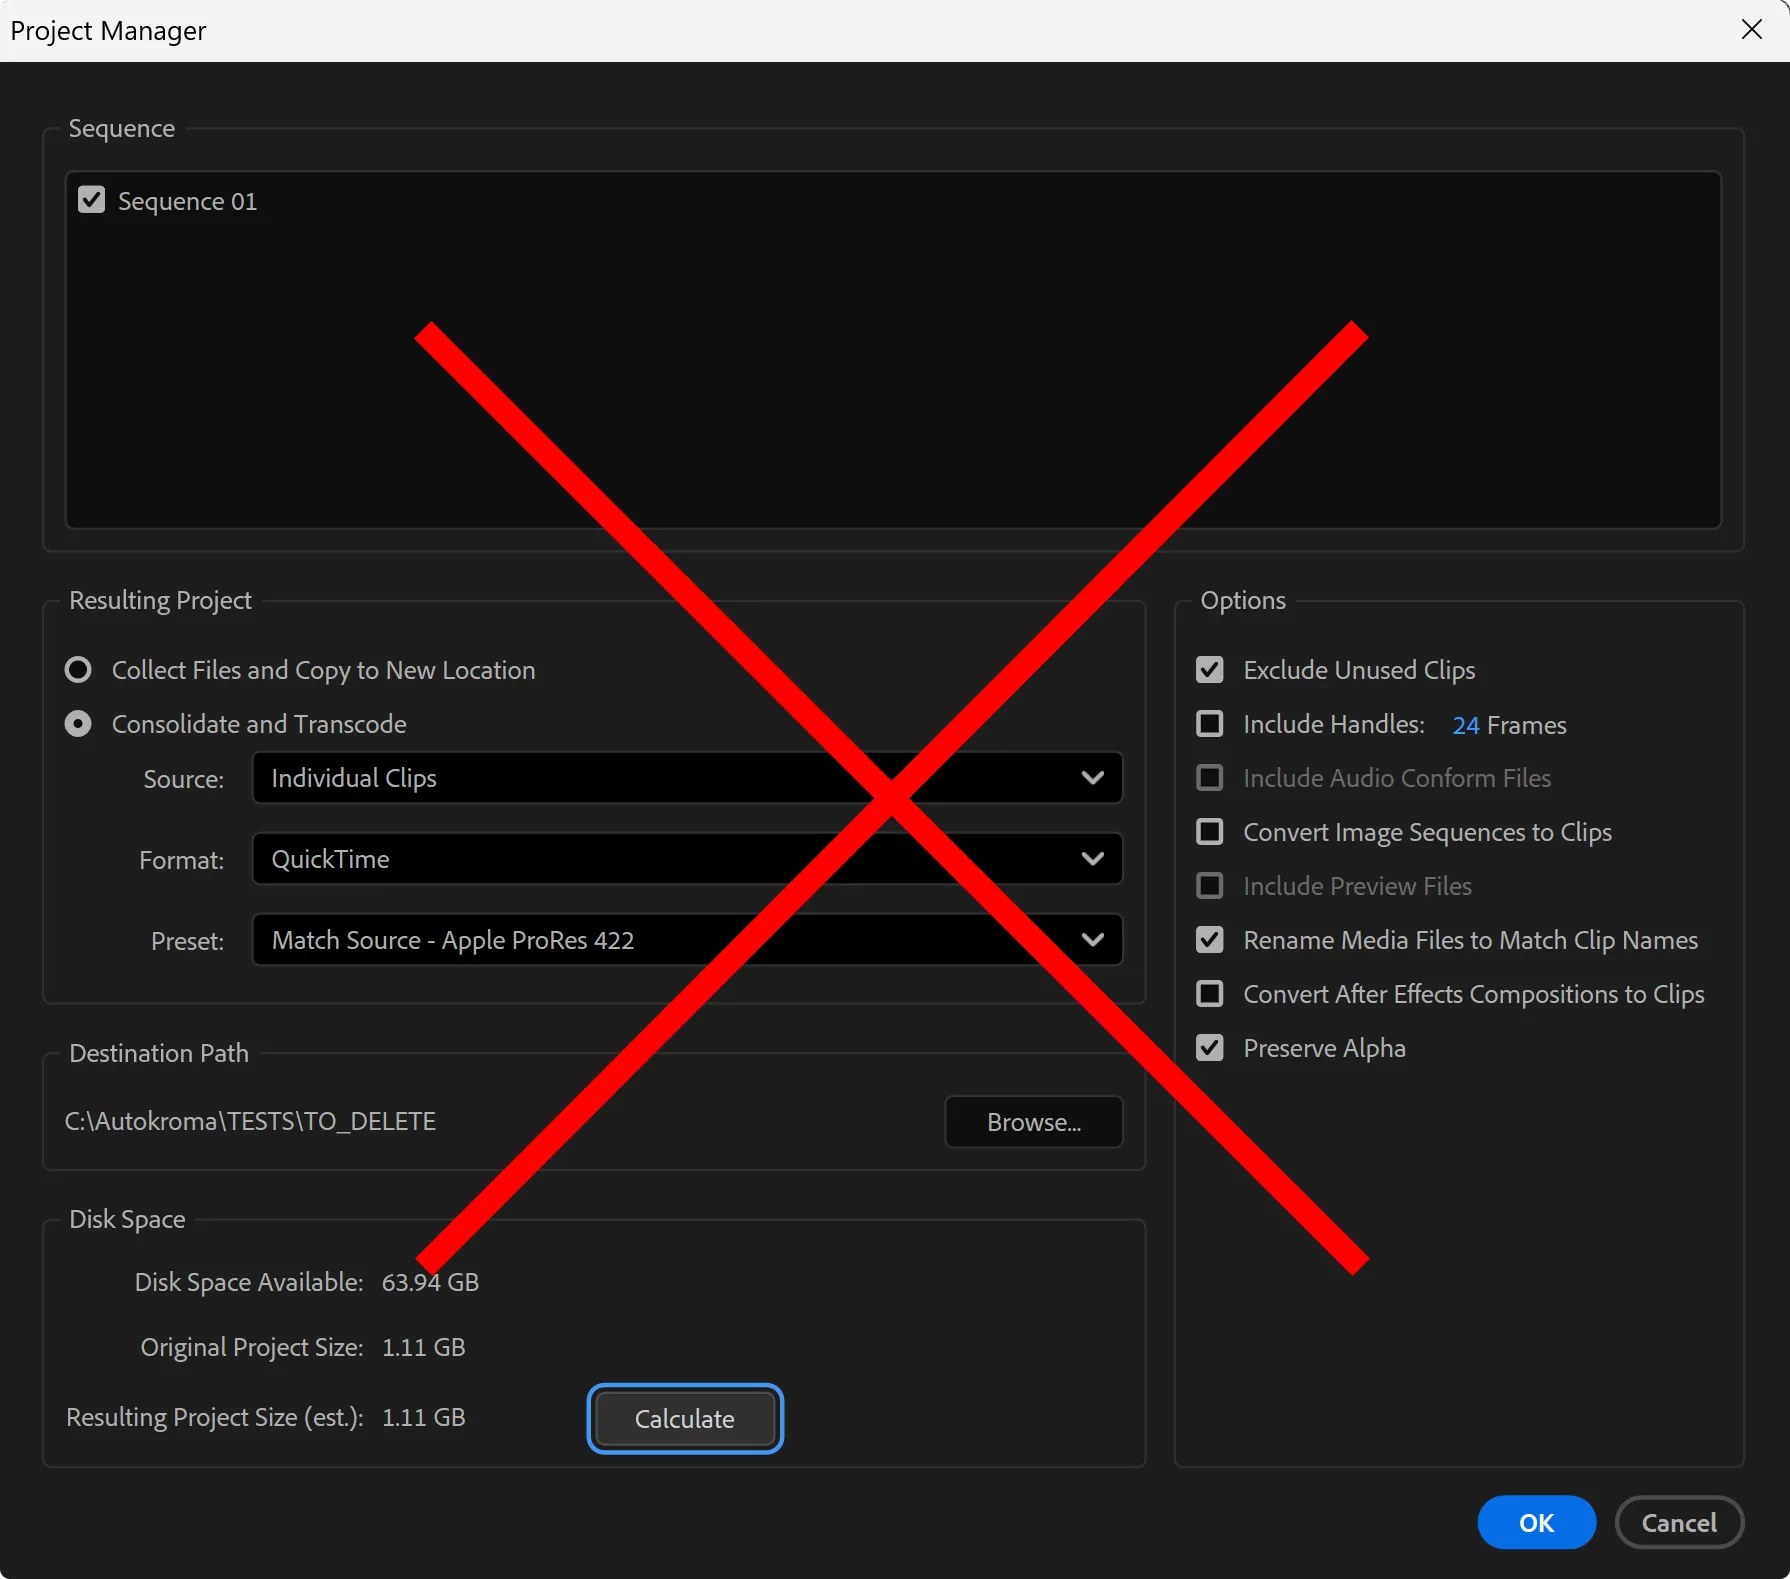
Without PlumePack, you can transcode your clips manually through Media Encoder by sending them one by one to the queue and choosing an export preset. However, this can take a lot of time, and mistakes can happen while choosing transcode options, resulting in incorrect audio channel layouts, wrong resolution, framerate mismatches, or other issues when replacing clips in your timeline.
You can also use the native Project Manager, but as explained in our article about the Premiere Project Manager:
- It may fail with generic "Unknown Error" messages
- It does NOT provide a clear feedback/report about what it actually did
- It may fail on some clips without explaining why
- It does not accurately compute the real usage length of clips across the project
This is why PlumePack is the best tools to reliably transcode and replace your media.
Transcode in PlumePack: A Fully Integrated Workflow
PlumePack allows you to transcode your clips in two ways:
- Through a full consolidation process
- By selecting specific clips directly in your timeline
Transcode your files through the PlumePack Consolidation
Your files are transcoded based on their actual usage in the current project.
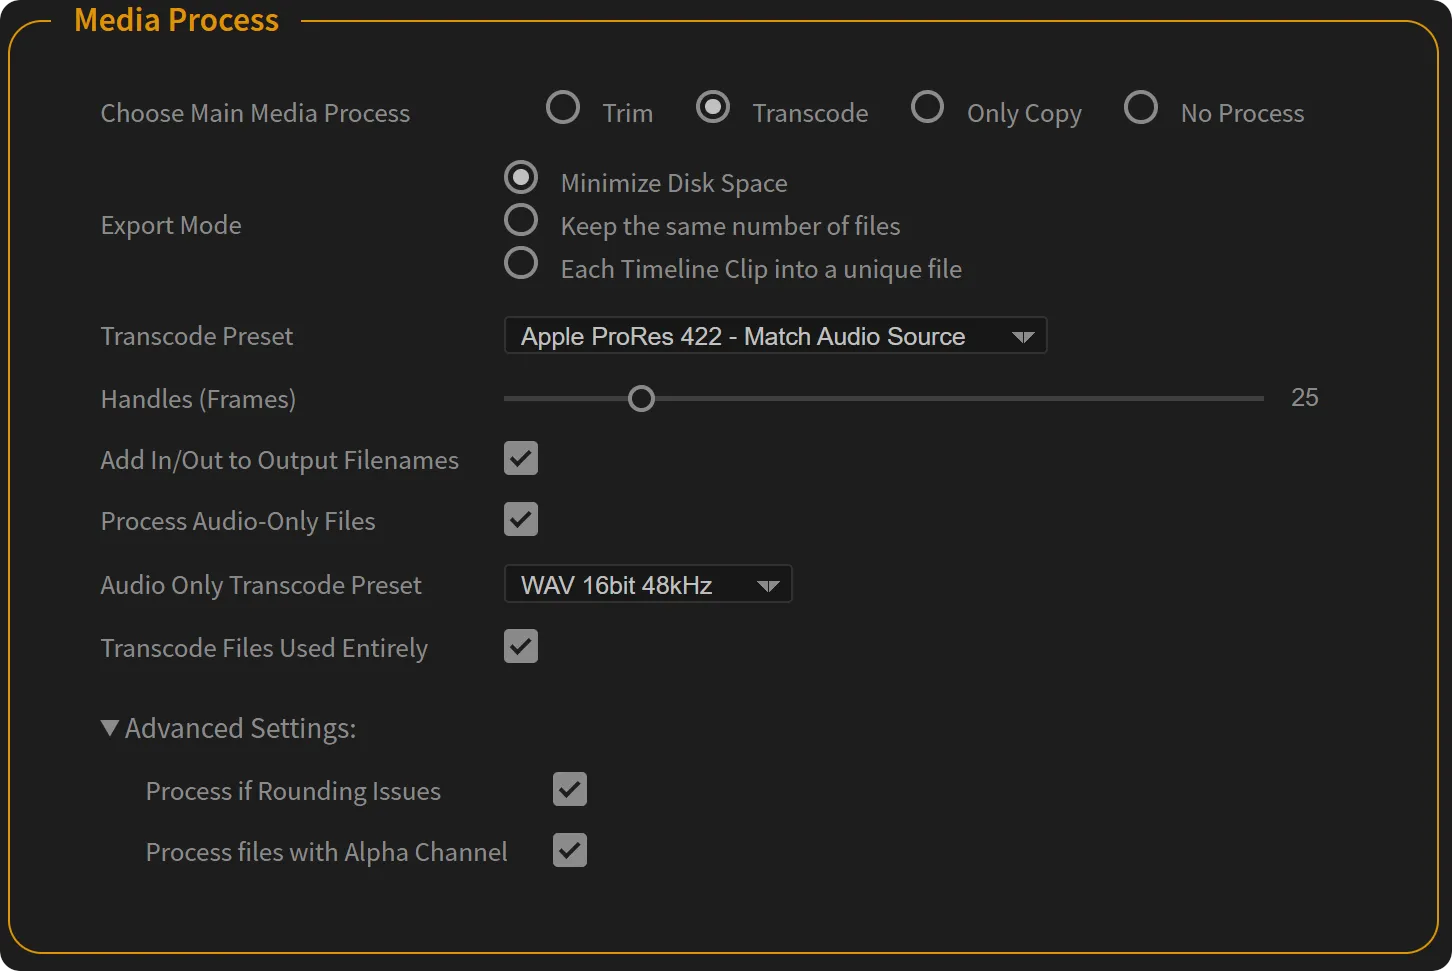
In the Main PlumePack options, set the "Media Process" to "Transcode", then configure both the Transcode options and the other consolidation settings:
- How your files are transcoded (codec, audio codec, handles, etc.)
- Which files or portions of files are transcoded (for example, based on a selected Main Sequence)
- Where the files are exported (output directory structure, filename rules, etc.).
You can get detailed information about each option directly in the panel by clicking on it, which opens the corresponding explanation in the Documentation tab. You can also read more about all options in this article.
Select your clips and Transcode in the Toolbox Tab
In the Toolbox tab of the PlumePack panel, you can quickly transcode and replace selected clips.
Then PlumePack creates a new project and automatically replaces the selected clips with the transcoded versions.
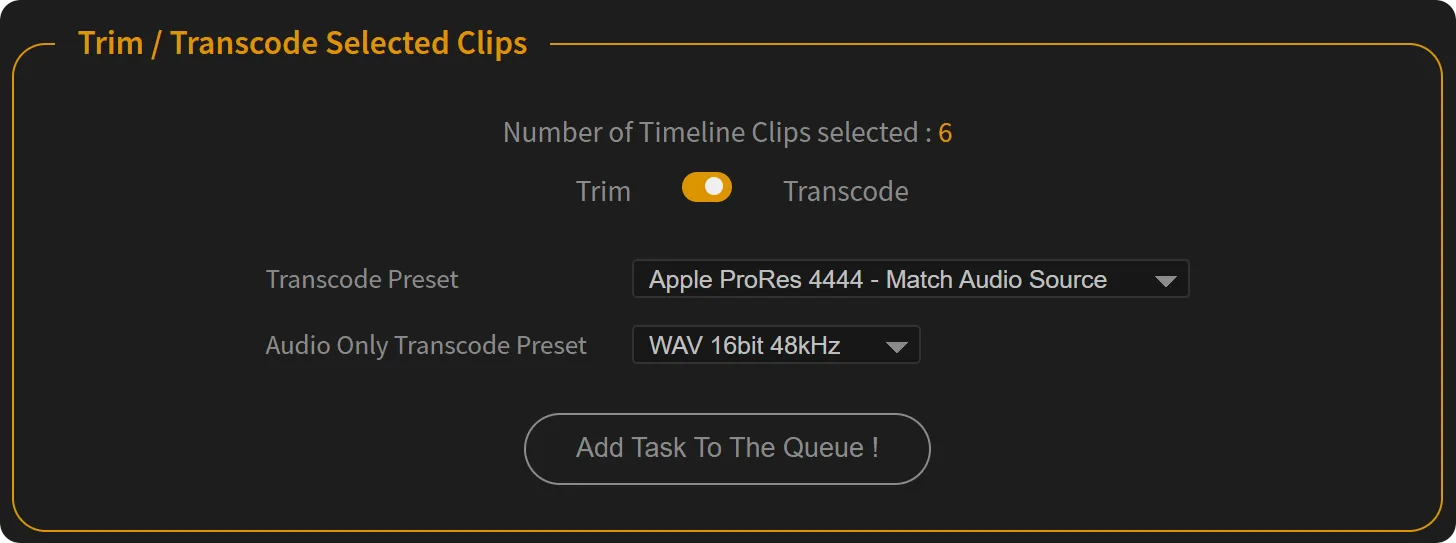
Optimize your workflow
Transcoded clips are automatically relinked by PlumePack in the newly created project.
If you choose Process in Background in the PlumePack Queue, you can continue working on other projects without risk of conflicts. The process will pause automatically when it needs control of Premiere, allowing you to resume and finish the task when you're ready.
Transcode vs Proxy: What’s the Difference?
Transcoding and proxy workflows both involve converting media, but they serve different purposes.
Proxies are temporary and designed for performance
Proxies create lightweight versions of your media to improve editing responsiveness.
When using proxies:
- Your original files remain unchanged
- Proxies are only used during editing
- You switch back to original files for export
- They are intended to be temporary
Proxies are ideal when working with very heavy formats like RAW or highly compressed camera codecs that slow down your timeline.
Transcoding creates new permanent master media
Transcoding replaces your original media with new, optimized files.
When using Transcode in PlumePack:
- The transcoded files become your new project media
- Your new PlumePacked project has its files relinked to these new transcoded files
- The result is a clean, self-contained, optimized project
No dependency on the original camera files. This makes transcoding ideal for archiving, consolidating, or standardizing a project.
When (and When Not) to Use It
Transcoding is a powerful tool, but it is most useful in specific situations.
Use transcoding when:
- You want to optimize and stabilize your project
- You want to archive a project for long-term storage
- You want to convert to a mezzanine codec for better reliability
- You experience poor playback performance with original media
- You need to prepare a project for collaboration or transfer
- You want to simplify project structure by using a consistent codec
You may not need transcoding when:
- Your media is already in an edit-friendly codec such as ProRes or DNxHR
- Your system handles your media smoothly
- You want to preserve the exact original camera files without modification
- Your edit-friendly codec is supported by Trimming (in this case, use the PlumePack Trim feature without re-encoding)
What’s Next for Transcoding with PlumePack
In PlumePack 3.1.0, we improved the Transcode feature by adding “Audio Match Source” support for the ProRes codec. Before this update, only stereo clips could be transcoded. Now, original audio channel configurations are preserved, making the feature suitable for more complex productions.
In PlumePack 3.2.0, we added 2 new presets: H264 MOV Fixed BitRate (CBR) and H264 MOV Adaptive BitRate (CBR). Those presets support Match Audio Layout, so it handles almost any audio configuration from your source files automatically. Those presets also have a configurable bitrate setting, addressing two often-requested features for H264 transcoding.
We are still considering further enhancements:
- Mixed Trim / Transcode consolidation: For example automatically transcode clips that cannot be trimmed, or select specific codecs that should always be transcoded during consolidation
- Effect baking during "Each Timeline Clip into a unique file" mode: An option to transcode clips with effects applied, generating baked media directly from the timeline
These features could significantly expand workflow flexibility, but we would like to understand how valuable they would be for real-world users.
If these ideas sound useful to you, please contact us and tell us about your workflow and needs. Your feedback directly influences the direction of PlumePack’s development.