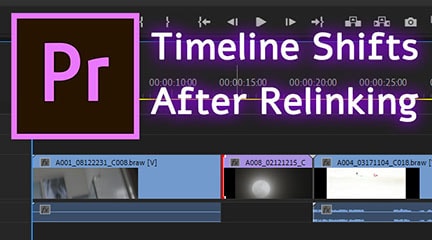
Premiere Pro Timeline Shifts (or First Frame) After Moving Project or Relinking Footage
December 24th, 2020
(Originally published on February 15th, 2020)
This Premiere Pro 2020 bug will shift your timelines or reset your clips to their first frame; here's how to fix your project!
Table of Contents
Update December 2020 : we have a brand new button in our BRAW Studio Premiere Pro Panel that will help you correct your project in one click !
What happened ?
Some BRAW Studio customers contacted us recently about a weird issue where their whole timeline would shift after moving their project, or moving their footage from one hard drive to another (or a network storage). BRAW Studio is our Adobe CC native importer for Blackmagic RAW format, so we are concerned by this issue. After investigation, we have no reason to believe it is linked to our importer nor that it is specific to the
.braw format. Some reported on Adobe Forums that this happens with different video formats.Are you facing this Premiere 2020 issue ?
You might be concerned by this issue if you're using Premiere 2020 and are doing any operation that would involve relocating footage. Sometimes Premiere Pro will relocate footage in the background, for example if the footage is relatively close to your
.prproj in your filesystem and you are moving both your .prproj Premiere project and your footage at the same time. After studying the case of our users concerned by this error, it seems to happen on both Windows and macOS but only in the 2020 version of Premiere Pro. It doesn't seem to happen in older versions of Adobe Premiere Pro and no one has reported to us that their audio files were also shifted (unless they are linked to a video file of course).Sometimes the "time shift" would make it so that the clips on your timeline return to their first frame. It seems to only affect the clips on your timeline (your editing) and not your Source Clip in your project panel. Although one user reported to us that after relocating / relinking, the Media Start timecode of its Source clips changed completely (see UserVoice issue below).
If you are experiencing timeline shifts with clips where you changed their "Media Start" timecode in the Project Panel, it could also be from another Adobe behavior, please read our other article about this : How do I avoid the Shift Issue in BRAW Studio ?
Tell Adobe to fix this issue !
Please upvote this issue on Adobe UserVoice : CC 2020 Timeline Clips Shifts After Moving Project / Relocating / Relinking .
Also if you suffer from this issue please tell your story and details here Adobe Forums / Community (CC 2020 Timeline Clips Shifts After Moving Project / Relocating / Relinking).
That'll hopefully make Adobe aware of this issue !
How to fix your timelines and your editing
If you don't want to wait for Adobe to fix this issue you have multiple options :
- Since BRAW Studio v2.2.3 we have a brand new button in our BRAW Studio Premiere Pro Panel that will fix this issue for you in one click !(more info below)
- You can try our automatic Relocation Tool in the BRAW Studio Panel (more info below)
- You could try to downgrade your Premiere project to CC 2019 : Online Website about it, or this Youtube Tutorial
- You could try to export a Final Cut Pro
.xmlfrom your first Premiere Pro project for each of your sequences, then after moving your assets (footage) in the new location, create a new Premiere Pro project and import each.xmlone by one. One user said it worked and another said it didn't. - If those methods didn't work, try out our manual method (at the bottom of this page)
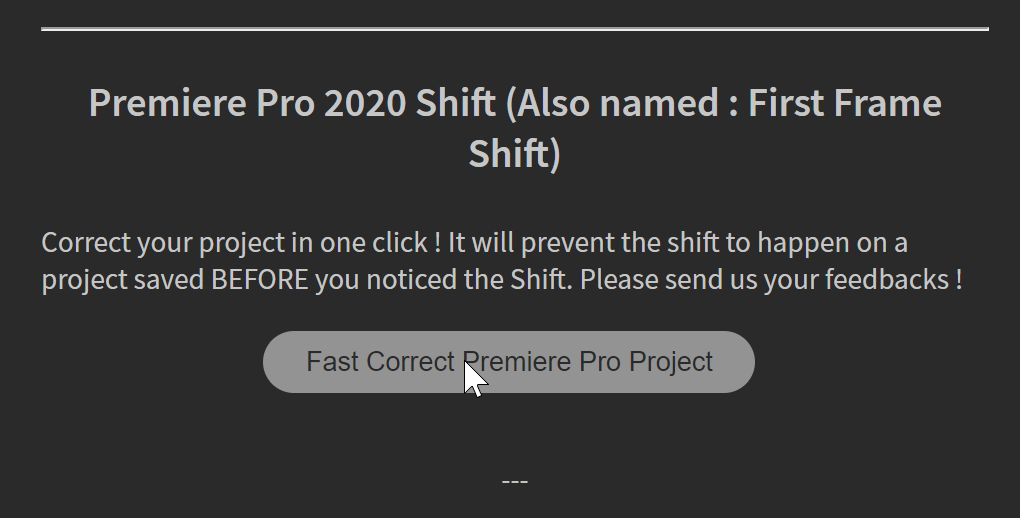
Autokroma's automatic method to fix your project in one click !
You can now correct your project in one click with our last tool !
It is aimed
preventing
the bug from happening, not fixing it once your project is corrupted ! So you need to have the original Premiere Pro Project file
which has not been saved after the relocation / relinking by Premiere Pro.Once the shift happens and the .prproj project has been saved, it will be impossible to recover your timeline without shifts. You can consider your .prproj corrupted.
Note : this method requires a registered BRAW Studio license V2.
So in order to correct your project :
- Open an empty projectin Premiere Pro
- Open the BRAW Studio Panel (top menu : Window -> Extensions -> BRAW Studio Panel)
- Open the "ToolBox" tab in the BRAW Studio Panel
- Click on "Fast Correct Premiere Pro Project" and select the path of the new corrected project.
Et voilà ! Your project is now corrected and should not suffer anymore from this bug.
Autokroma's old relinking method to fix your project
Pre-conditions
This tool should be used only if the first method above didn't work.
It has the same prerequisite than the first method above, so you will need to apply it to the original Premiere Pro Project file which has not been saved with the shift bug.
You also need to have your files on their new location. This tool will change the .prproj file so as to avoid Premiere Pro relinks the files once you open the project. No Relinking = No Shift !
If you don't have a license for BRAW Studio V2, you can't use this feature. If you need to test it before buying, contact us. This tool also works for files that are not .BRAW, it will try to relink all missing files.
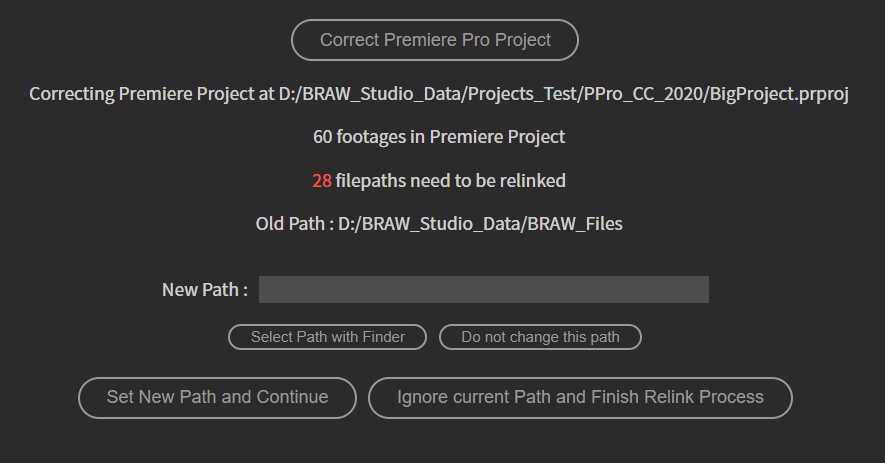
Step 1 - Open Premiere Pro and Select your Project File
First, open Premiere Pro (don't open your project file, you can open a new empty project) and open the BRAW Studio Panel (Top Menu : Window -> Extensions -> BRAW Studio Panel).
On the "Shift Issue" tab of the Panel, click on the "Premiere Pro Project" button and select your original Premiere Pro project file.
After this, you should see a change in the Panel, and there will be some buttons to help you relocating your files to their new paths.

Step 2 - Relocate your files
The Panel will show you one by one some paths which have been taken from the prproj, and you will need to enter the new path for them.
In order to give a new path, you can paste it in the text input after "New Path :", or just hit the "Select Path with Finder", and then click on "Set New Path and Continue".
The first paths asked are some "common" folders automatically detected from all your different paths.
If you don't see any correspondence for these first folder paths, hit the "Do not change this path" button
.Then, the first asked paths are BRAW paths. If the "old path" given is different than a BRAW path (example : old path is a MOV file), you are sure that all BRAW files have a correspondence at this step. So in case the shift only happen to your BRAW files (and not on other files), at this step you can hit the "Ignore current Path and Finish Relink Process" button.
Note that every time you relink a file, other files located near this file will be automatically relinked, and so you should not have to give a new path for all your files : just some of them will be needed and the rest will be automatically deduced.
You can see how many paths still need to be relinked : it is updated each time you enter a path correspondence.
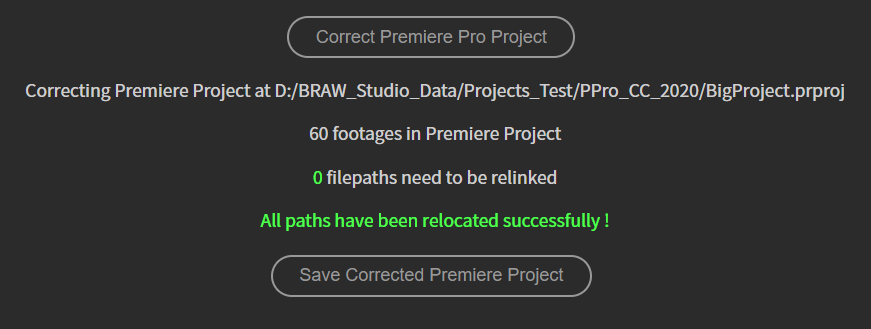
Step 3 - Export your new prproj relinked
At the end, you should see "All paths have been relocated successfully !" in green.
Click on "Save Corrected Premiere Project" to save your corrected project.
Autokroma's manual method to fix your project
The method we're going to describe for you worked for one of our BRAW Studio customer.
Preparations 1 : Know your Paths
Focus, this is important. Before beginning this method you should write down
the current path
of your footage, and the new path
of your footage after moving it. If it could all be contained in one global folder, that would be best (even if you have subfolder, at least the folder structure would be the same from this global folder).For example if you have the following :
D:\MyLatestPProProject\PProProject.prprojD:\MyLatestPProProject\Footage\January\FirstShoot.brawD:\MyLatestPProProject\Footage\February\SecondShoot.braw
and you want to move your project this way :
E:\FromMyPreviousComputer\MyLatestPProProject\PProProject.prprojE:\FromMyPreviousComputer\MyLatestPProProject\Footage\January\FirstShoot.brawE:\FromMyPreviousComputer\MyLatestPProProject\Footage\February\SecondShoot.braw
then your "global common folder" would be before :
D:\MyLatestPProProject(this would be yourPREVIOUS_PATH)
and then after you move your project and assets :
E:\FromMyPreviousComputer\MyLatestPProProject(this would be yourNEXT_PATH)
Preparations 2 : Install Software
If you're on Windows, download and install 7zip https://www.7-zip.org/.
If you're on macOS please download Keka https://www.keka.io/en/.
You also need a code editor that supports "Search and Replace", such as Notepad++ https://notepad-plus-plus.org/ or VS Code https://code.visualstudio.com/
Our manual method steps
So now you're ready to fix your project using our manual method :
- Suffix your Premiere Pro project with
.gzand extract what's inside with 7zip or Keka (see preparations) - Suffix the file you obtained with "_fixed.xml"
- Open this file with a text editor that supports "Search and Replace" (see preparations) and find this feature, often in the "Edit" or "Search" top bar menu
- Search for :
<FilePath>PREVIOUS_PATHand Replace by this<FilePath>NEXT_PATH. Replace of course the value ofPREVIOUS_PATHandNEXT_PATHwith what you got in the preparation of this method. Beware of forward slash and back slash ! In our example you would look for<FilePath>D:\MyLatestPProProjectand replace it with<FilePath>E:\FromMyPreviousComputer\MyLatestPProProject - Same again : use the Search and Replace of your text editor, search for :
<ActualMediaFilePath>PREVIOUS_PATHand replace by this<ActualMediaFilePath>NEXT_PATH. In our example you would look for<ActualMediaFilePath>D:\MyLatestPProProjectand replace with<ActualMediaFilePath>E:\FromMyPreviousComputer\MyLatestPProProject - Save the file
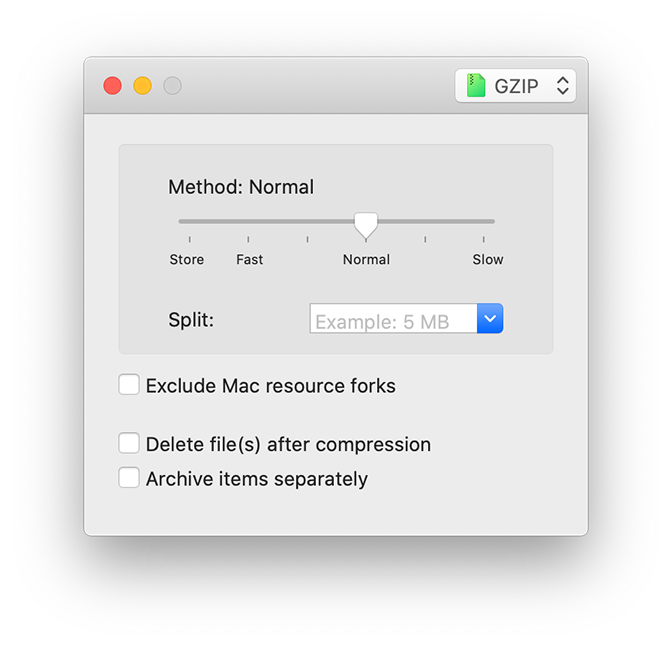
- Use the gzip software again (see preparations) to compress this file using the "gzip" choice. If you use something else it won't work, you need to select GZIP ! See screenshot for macOS, on the top right :
- Suffix the file you get with
.prprojso that Premiere Pro will be able to open it - Move your assets and move this new Premiere Pro project file to your new location. Open this file with Premiere Pro and enjoy!
On steps 4 and 5 you should get a confirmation by your text editor has replaced elements in your file. If it didn't something is wrong ! If you got it wrong at some step you should always start again from step 1. and never modify your original project.
Some users reported to us they replaced step 4 and 5 with a simple Search and Replace, replacing their PREVIOUS_PATH with their NEXT_PATH. This can work on some projects, but we cannot guarantee it works 100% of the time. If you change all paths directly you might change other places in your project, leading to a corrupted or unusable Premiere Pro project and you might discover this too late.
We assure you this method works if followed properly, good luck !
The BRAW Studio Panel BRAW Settings tab
Our V2 update of BRAW Studio introduces a new tab of our panel to let you color grade in a more efficient way and with batch modifications to a selection of .BRAW !
Read more
BRAW Studio for After Effects is available now
Learn the basics of color grading Blackmagic RAW (.braw) in After Effects !
Read more
PlumePack Options Explained
What are the PlumePack options ? You should get all information here !
Read more
PlumePack your Project with Proxies
How you can use PlumePack if you are working with Proxies in your project !
Read more
BRAW Studio Version 3 Upgrade
Learn about the new features of BRAW Studio V3 and the upgrading process
Read more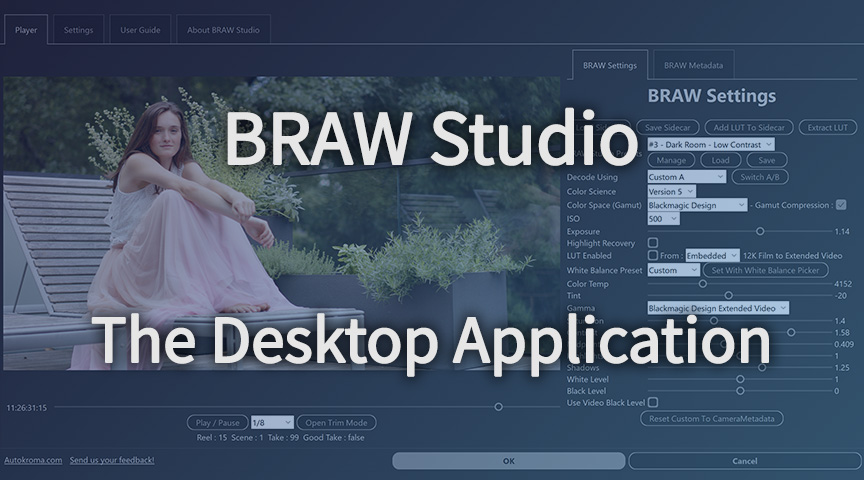
BRAW Studio App: A New Powerful Tool for BRAW Files
Details about the new BRAW Studio App: a BRAW Player where you can edit Settings, trim and more!
Read more
Fast Color Correct with the BRAW Studio White Balance Picker
Indicate the white/grey part in your BRAW image to set automatically Color Temperature and Tint accordingly !
Read more